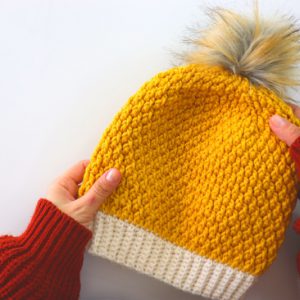
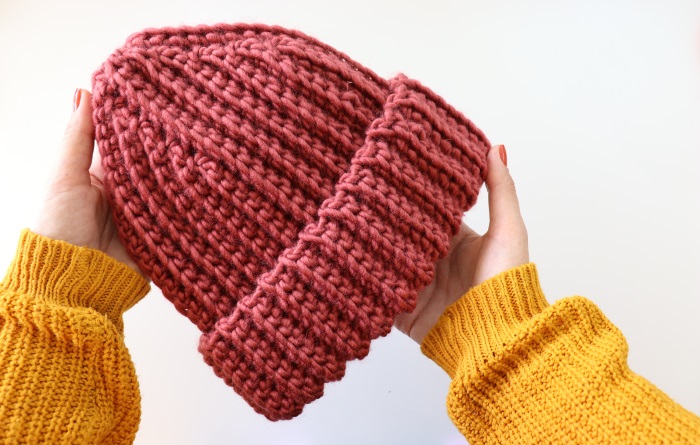
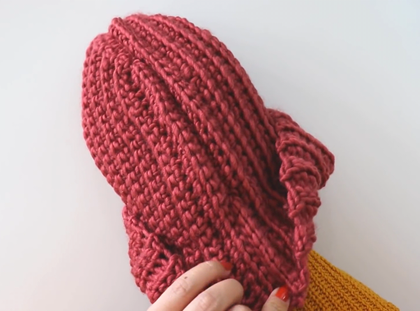
This is one of the most original beanies ever. The pattern is really easy to follow and quick to make. You can make this cozy beanie for anyone, for any size you want. I hope you enjoyy..
- You can purchase the ad-free PDF versions of my patterns on Etsy.
- You can print the PDF’s and use them anywhere you want. This way you can also support my works too.
MATERIALS
Yarn – Papatya Roving, 100g/100m , a little more than 1 skein
8 mm Crochet Hook
Yarn Needle
Scissors

STITCHES & ABBREVIATIONS
ch = Chain
st(s) = Stitch(es)
sl st = Slip Stitch
blo = Back Loop Only
sc = Single Crochet
NOTES:
*Sample is for adult size.
*US crochet terms are used in this pattern.
*Total stitches are indicated in between < >.
*Make your turns always in the same direction.
*This is an easily adjustable pattern for any sizes. The pattern is worked in lengthwise. You can make your chains as long as you like.
*If you want to make the beanie wider on the top, you can leave 12 stitches instead of 10. Or, if you want to make it narrower leave 8 stiches instead of 10. It’s totally up to you.
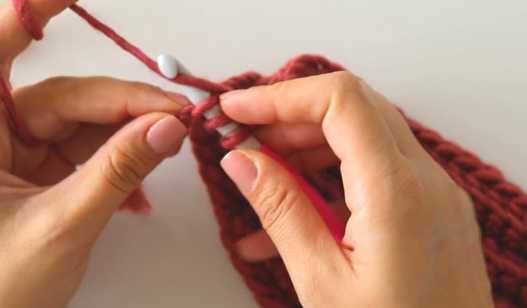
ch 35. work in back bumps of ch base.
Row 1: sc in 2nd ch from hook, sc in each ch until last 10 ch left, sl st in next ch, leave 9 ch and turn. <25>
Row 2: ch 1, blo sc in each st across, turn. <25>
Row 3: ch 1, blo sc in next 25 sts, sc in next ch, sl st in next ch, turn. <27>
Row 4: ch 1, blo sc in each st across, turn. <27>
Row 5: ch 1, blo sc in next 27 sts, sc in next ch, sl st in next ch, turn. <29>
Row 6: ch 1, blo sc in each st across, turn. <29>
Row 7: ch 1, blo sc in next 29 sts, sc in next ch, sl st in next ch, turn. <31>
Row 8: ch 1, blo sc in each st across, turn. <31>
Row 9: ch 1, blo sc in next 31 sts, sc in next ch, sl st in next ch, turn. <33>
Row 10: ch 1, blo sc in each st across, turn. <33>
Row 11: ch 1, blo sc in next 33 sts, insert hook into leg of last sc of row 10 and last ch of ch base, grab the yarn and pull through all the loops on hook, turn. <34>
Row 12: ch 1, blo sc in each st across, turn. <34>
**The pattern follows a set of 12 rows. We will make 4 sets in total. Starting from row 13, repeat the rows 1-12. The only difference for coming rows is you will work in stitches instead of chain base.
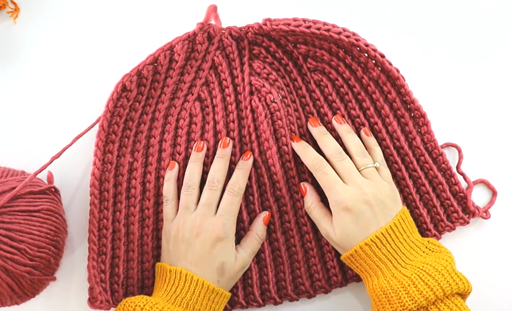
ASSEMBLY
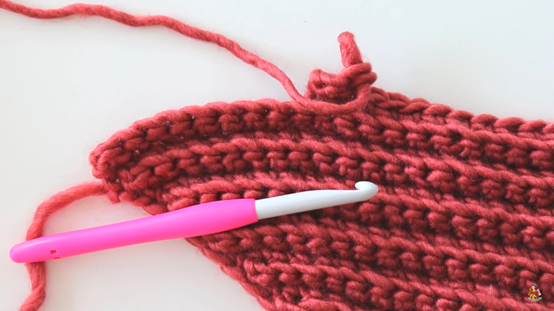
When you finish, fold it in half so that foundation and last row are on top of on another. Drop the working loop and insert hook to the first stitch of foundation row and pull through the working loop in it, join them together and ch 1. Insert hook in same stitch again and the back loop of the last row, make a slip stitch. Working through the both loops of foundation row and back loop of the last row, seam the two rows together by slip stitching next 9 stitches. Turn your work inside out. Grab the working loop through the coming st of last row, ch 1. From now on, make your slip stitches through the both loops of both ends. Continue across. Leave a bit long tail and fasten off. Close the top of the hat. Weave in your ends.
Pattern created by Sirin’s Crochet
Written by Ece Bektas (@ecelibuculu)
Copyright: This pattern is copyrighted by Sirin’s Crochet and may not be copied, sold, distributed and claimed as yours. You are more than welcomed to share and sell your makes using this pattern. Please give credit to Sirin’s Crochet.
Please feel free to visit my Youtube channel at Sirin’s Crochet for more free video tutorials and don’t forget to subscribe to be notified for more free patterns.
- Video Tutorial